Registration cards are generated for and record the essential information of all guests. The purpose of the guest registration card is to enable the Property to keep a proper track of all guests, as well as to ensure that the guest has been properly informed of any and all policies (such as check-in/out times or pet policies). All guests should sign a registration card when arriving at your Property.
Registration cards may be printed out for guests to sign as part of the Night Audit process (see Registration Cards - Batch Print for more details). However, you may instead use ELECTRONIC signatures for your registration cards, if you have the appropriate signature capture device. This enables the guest signature to be saved into your Skyware System records without the need for paper copies for your files.
Setting up the use of electronic signatures for registration cards at your property is a multi-step process, but each step is straightforward and once completed electronic signatures are simple to use.
First, all electronic signatures are recorded using a signature capture device. Your Property cannot employ electronic signatures without first purchasing one. (You may use either a dual purpose credit card processor and electronic signature capture machine from your credit card gateway or processor, such as Tenerum, or obtain a stand alone electronic capture device, from a supplier such as Topaz). It is a physical device that needs to be attached for use, and should then be kept on the counter for the customer to use.
Once you have a signature capture device, it is set up within Skyware in a similar manner to a standard pinpad/EMV machine. Any such device for your property need to be configured into the system before it can be recognized and made available. Then, once the machine is entered into Skyware, the text that should appear on the device screen for the guest to read before they sign should be entered. This is done using the Signature Pad(s) screen, reached via the Reg/Conf tab of the Property Definition screen. This text would usually be what is seen on the (paper) Registration card, and can include tokens for retrieving information specific to the guest.
After the device has been entered into Skyware and text generated for the screen display, it is ready for use. Once your Property has an electronic signature device set up for use, an icon for its use will appear in the tool bar of the Main Folio screen of any stay. This is the "Activate the electronic signature pad for the registration card" icon. Using it will both activate the capture device and open a capture signature screen in Skyware for the employee to view. Once the guest has signed on the device, a copy of the signature will be displayed on the capture signature screen, where the employee must click the orange button Save and Exit to proceed. (This allows the employee to determine that the signature has been successfully captured for your records). The guest will then receive an email which contains both the text entered on the device and their signature at the bottom, as a record of what they have just signed. A copy is also entered into Skyware, attached to the stay documents for the folio. This ensures that the Property has a copy for future reference purposes.
Note: Once the file containing the electronic signature has been attached in the stay documents, the "Upload a File" icon background will be YELLOW, not white, indicating that the folio has at least one document attached. The file may be viewed by clicking the icon.
Electronic signatures may be used in combination with a contactless check-in kiosk to allow incoming guests to check in at your Property WITHOUT first going to the front desk. This form of remote check-in may be used for ANY guest types, and requires a contactless "kiosk" (set up with a computer terminal/tablet, and an associated dual purpose credit card processor and electronic signature capture machine) where the incoming guest can find their reservation, digitally sign the registration card, and complete the credit card transaction before receiving the email providing the electronic key/code (as in mobile check in). Please see Mobile and Contactless Check-In for more details, and contact Skyware if you wish to set up this as an option at your Property.
Note: Electronic Signatures (for use at your property with your registration cards, if you have the appropriate signature capture device, enabling the guest signature to be saved into your Skyware System records without the need for paper copies for your files) and Electronic Document Signing (the ability to enable electronic signing of custom documents by guests at your property via email) are two separate functions in Skyware. Please also see our Electronic Document Signing Help Topic for more details.
An electronic signature capture device is a physical piece of hardware. It is not purchased through Skyware, rather through a supplier such as Tenerum or Topaz. Depending on your supplier, the machine may either be dual purpose or a stand-alone. It should be located on the counter to provide easy access for the guest to use.
Before use, it must be entered into Skyware as you would other hardware. This is done using the EMV Stations screen.
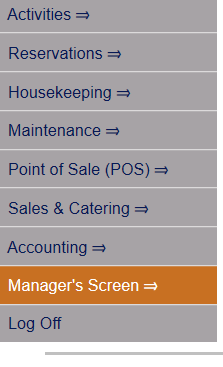
From the quick menu (left) choose Manager's Screen to be taken to the MANAGER'S COMMANDS screen.
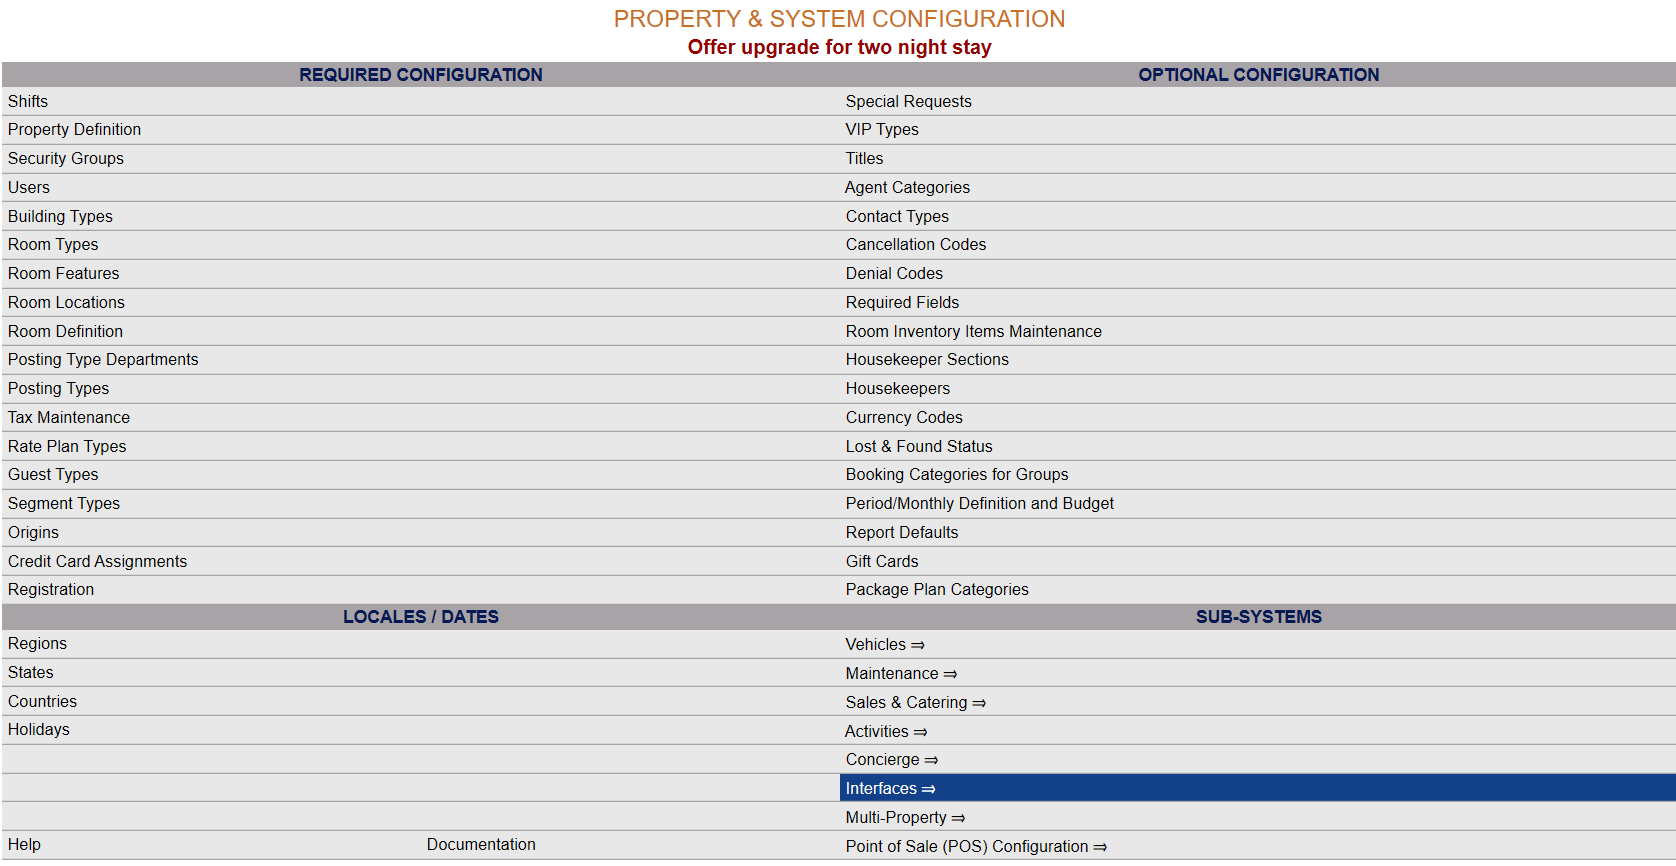
Select Configuration to be taken to the PROPERTY AND SYSTEM CONFIGURATION screen.
Select Interfaces from the Sub-Systems area of the screen.
This will take you to the INTERFACES MAINTENANCE menu screen.
Interfaces area commands are divided into four sections: Channel Interfaces, Texting Interface, Other Interfaces and Other Interface.
The command is in the Other Interfaces section of the menu. Select PinPad (EMV) Stations from the Other Interfaces section of the Interfaces Maintenance menu.
The EMV Stations screen display is split into two frames, with the left side of the screen listing any already configured EMV Stations for the property and the right side containing the fields you need to complete in order to add or edit an EMV Station for the property. Any changes made on the right, once saved, will be updated in the listings to the left.
The currently configured options can be displayed by:
Order: List order, a numeric ordering,
ID: The Pin Pad (EMV) station ID,
Description: This is the description or location of the configured station.
Selecting any Pin Pad (EMV) station will display the details on the right.
Your options include the following:
Generate a new entry:
Click the New button from the toolbar to add the electronic signature capture device.
Complete the fields described below.
OR:
Select an existing Pin Pad (EMV) station from the list on the left, and click the Replicate button from the toolbar. Then change the field information as described below.
Edit the current selection:
Change the field information described below.
Note: This may be possible if the device you have is dual purpose.
PinPad ID: This is the ID provided upon set up of the device.
This field is required.
List Order: This determines in what order the Pin Pad (EMV) station appears listed in the interface.
Enter a number into the List Order field.
This field is optional.
Local URL: This is the local URL for the device, for location purposes.
This field is required.
PinPad Description: This is the description of the device, for staff to be able to locate it.
This field is required.
Device is Installed locally: This box may be checked or unchecked. By default, it is unchecked.
If it is checked, this means the device is installed on the actual machine/local Skyware Systems server, and not just physically connected to it. This box is only used with the Shift4 Credit Card Gateway.
Use this EMV device on this workstation: This box may be checked or unchecked. By default, it is unchecked. If it is checked, this means your workstation will use the device currently in the configuration field as the machine connected to it.
Can this device accept registration card signature? : This box may be checked or unchecked. By default, it is unchecked. To use this device as an electronic signature capture device THIS BOX MUST BE CHECKED.
EMV Transactions: There is a field below the configuration options that will display any transactions performed using the particular Pin Pad (EMV) station, with details of that transaction (such as time sent, any error that occurred, if the transaction timed out etc). This table is display only.
When you are finished adding or editing the electronic signature capture device, click the Save button to save the changes.
The text displayed on the screen of the electronic signature capture device should be added using the Signature Pad(s) screen, which may be reached via the Reg/Conf tab of the Property Definition screen. This text would usually be what is seen on the (paper) Registration card, and can include tokens for retrieving information specific to the guest. It should be added line by line, as the capture device screen does NOT allow scrolling to the right, but DOES allow scrolling down or paging down. Multiple short lines of text, rather than one long line of text, means that all text will therefore be viewable on the screen.
Note: SOME text must be added for display on the capture device screen before the machine may be used for capturing signatures for the purposes of registration. Until text has been added, the tool bar icon enabling electronic signature selection will NOT be available for use.
Add the Text:
Select Managers Screen from the Quick Menu on the left side of the screen, then select Configuration > Property Definition.
Select Manager's Screen to be taken to the MANAGER'S COMMANDS screen.
Select Configuration to be taken to the PROPERTY AND SYSTEM CONFIGURATION screen.
Alternately, you may also be able to select Configuration directly from the Quick Menu, if the menu has been set up to include the Configuration option.
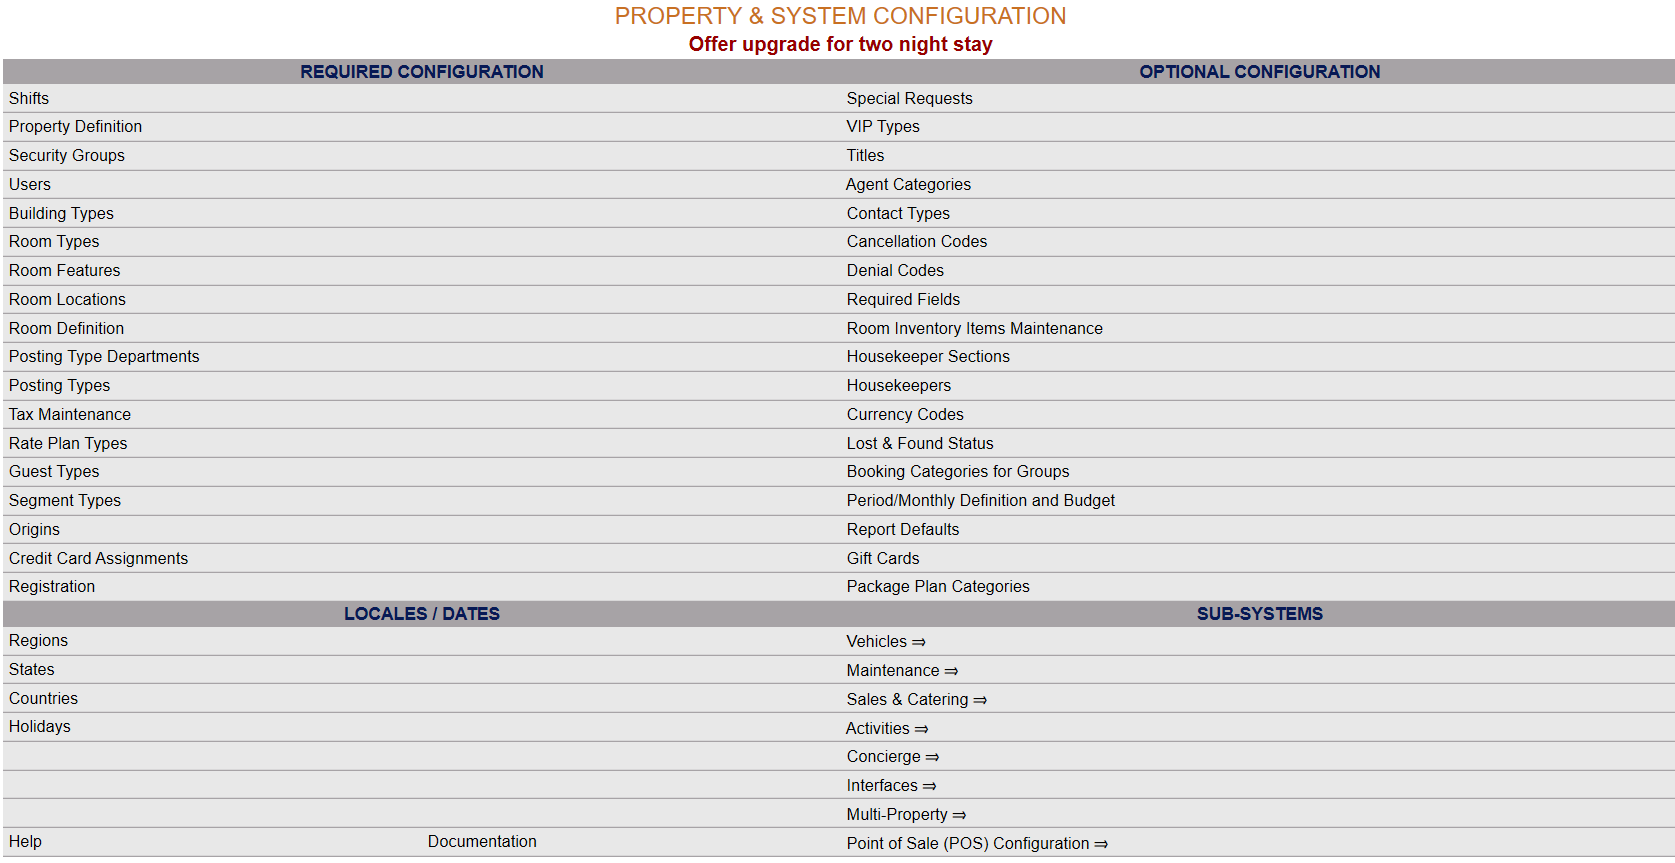
This will take you to The Property System Configuration Menu.
The list of property configuration options are divided into four sections, which are Required Configuration, Optional Configuration, Locales/Dates and Sub-Systems.
Select Property Definitions from the Required Configuration section.
When selected, the Property Definition screen will open.
Note: If you have multiple properties, ensure that the property being viewed is the correct one.
When selected the Reg / Conf tab will be displayed.
Click the gray button Signature Pad Text to open the Signature Pad(s) screen.
Note: The first time any text is to be added, Skyware will inform you that there are no records to display, and ask if you wish to add a new record. Click "OK" to continue to the screen.
You must add a Signature Pad document to this screen before you can begin adding the text to be displayed upon the electronic signature capture device. Text is added using the Signature Pad Lines section, which is not available for use until the Signature Pad entry has been saved.
Note: This function enables you to create multiple different entries that can be displayed on the electronic signature capture device at different times, if desired. If multiple Signature Pads entries are to be created/used, the check box Overall Default should be selected for one of them to designate it as the entry used by default.
Click the gray button Signature Pad Text to open the Signature Pad(s) screen.
Note: Again, the first time any text is to be added, Skyware will inform you that there are no records to display, and ask if you wish to add a new record. Click "OK" to continue to the screen.
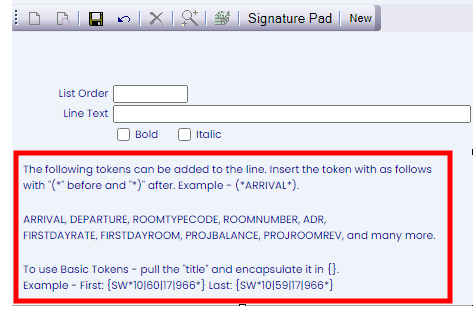
List Order: This determines in what order the text lines appear on the electronic signature capture device screen..
Enter a number into the List Order field.
This field is optional, however we strongly recommend that you list the text lines in the order you prefer. This prevents the information from becoming jumbled, as otherwise by default the lines will be ordered alphabetically..
Line Text: This is where the information to be shown on the screen should be entered. Each line of text should be entered separately. Ensure that the complete line of text can be read on the screen by keeping each line entry short. The machine will not allow scrolling to the side but does not automatically produce line breaks to keep the text in view - if the entered text per line is too long, some of it will not be visible to the guest. As the character count per line may vary due to the choice of font, number of capital letters used etc., text lines should be reviewed on the actual machine for readability after they have been entered.
Bold: This box may be checked or unchecked. If checked, the ENTIRE LINE of text will appear in bold when displayed on the screen.
Italic: This box may be checked or unchecked. If checked, the ENTIRE LINE of text will appear in italics when displayed on the screen.
You may also select TOKENS to enter into the text.
Tokens represent information such as hotel name, guest name or room number and may also be added into the body of the text to help tailor the message to the individual guests receiving it. These use a specific token ID to pull the individual data from your Property. When the text is sent, the token IDs are swapped out for the actual data. Skyware has lists of the names of the token IDs available for you to select from. Ensure that you select the correct token ID desired - for example there may be several last names associated with a stay - the token ID means that you can specify the correct last name to use, rather than all. Ensure that you enter the correct token ID desired - for example there may be several last names associated with a stay - the token ID means that you can specify the correct last name to use, rather than all. Skyware has many token IDs available. As such, the token ID may not be easily recognizable for what it represents once it has been embedded into the text. Be sure to enter your selection carefully. Frequently used tokens have been listed on the Signature Pad Text screen for easy use.
Note: To view the list of other basic tokens available please see the Document Editor screen used when creating or customizing your own documents. The general tokens, also known as the basic tokens, available everywhere may be viewed in the drop-down menu that appears on the screen when clicking the box "Select Token to Insert..."
(Please contact Skyware if you are having trouble using or locating the desired token ID).
For example: If you wish the first line of text to appear on the electronic signature capture device to be the guest name, you would enter tokens representing first name and last name into the text line. When displayed on the screen, the tokens are replaced with the retrieved information for the specific guest (i.e. their first and last names).
When saved, the text lines entered will appear on the left of the Signature Pad Text screen, in the order specified.
The text lines shown on the left may be selected for display and editing at any time on the right. Remember to check how they appear on the screen of the electronic signature capture device before its use, and adjust the length of the lines as necessary.
After finishing adding text lines you may return to the Signature Pad(s) screen by clicking the gray "Signature Pad" button in the tool bar.
The text lines entered using the Signature Pad Text screen will now be shown in the Signature Pad Lines section (and may be clicked on individually to edit via the Signature Pad Text screen or deleted here as wished).
Once you are happy with the appearance and content of the text to be displayed on the capture device, it is ready for use.
Once your Property has an electronic signature device set up for use, it may be activated for use via the tool bar of the Main Folio screen for the stay in question. An icon called the "Activate the electronic signature pad for the registration card" icon will appear in the Main Folio tool bar, between the Registration card and Confirmation card icons that are always present.
Using it will both activate the capture device for the guest to use and open a pop-up window showing the capture signature screen in Skyware for the employee to view.
Once the guest has signed on the device, a copy of the signature will be displayed on the capture signature screen, and the "Save and Exit" button will become available for use. This allows the employee to determine that the signature has been successfully captured for your records. The employee MUST click the Save and Exit button to proceed.
Note: If the icon was clicked inadvertently, or the signature capture was unsuccessful (illegible signature or other problem) the employee may simply click the orange button "Cancel" to close the pop-up window and return to the Main Folio screen. The icon may then be clicked again to begin the capture process again.
Once the signature has been saved, the guest will then receive an email which contains both the text entered on the device and their signature at the bottom, as a record of what they have just signed.
A copy is also entered into Skyware, attached to the stay documents for the folio. This ensures that the Property has a copy for future reference purposes. Once the file containing the electronic signature has been attached in the stay documents, when viewing the folio for the stay, in the tool bar the "Upload a File" icon background will be YELLOW, not white, indicating that the folio has at least one document attached. The file may be viewed at any time by clicking the icon.
Date Updated March 20, 2024